Making a Feature Plank (Kayakcraft Excerpt)

Especially after sharing David Parker's excellent time lapse build, we noticed an uptick in interest in how to install feature planks. While there's more than one way to customize the look of your canoe or kayak with pattern strips, Kayakcraft offers a detailed description of Ted's preferred process. We hope this short except makes things clearer if you're hoping to incorporate a design into your next build (with apologies for the black and white photographs - the originals were unavailable).
If this excerpt piques your interest, copies of Kayakcraft are available here.
Making a Feature Plank
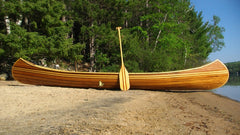
This idea orginated at Ron Frenette's Canadian Canoe Company, inspired by the need to make use of a surplus pile of short, dark planks. Some of the gentlemen building Endeavour 17s in Ron's shop picked up on the idea and began doing variations of the pattern we are using here (Photograph 4-8). When the dust had settled, there must have been a dozen or so variations on this theme used in both hull and deck. The possibilities are endless, limited only by the colour of the available materials and your imagination.

The crew at Canadian Canoe assembled the pieces for the feature planks on the mold, one piece at a time, and found the process quite fussy. I have taken the idea a step further by gluing all the pieces together in a jig on the bench, then installing it as a full-length plank. This worked out slicker than I had imagined it would. The pieces went together quickly, and none of the glue joints let go on the way to the mold.
A custom planking detail, placed judiciously, will personalize your boat. To make one, begin by drawing a full-sized pattern that will include the plank lines and the design. Keep in mind that the width of the plank lines you are going to draw is the width of the plank coverage rather than the width of the plank (i.e., subtract the bead or cove. The angle of the bevel will depend on your design, but a longer bevel will suggest a feeling of forward motion and the larger gluing area will result in a stronger joint. You might want to tape the pattern into position on the mold to be sure the scale is appropriate to the size of the hull.
Basswood and dark Western red cedar are used in Photograph 4-9 for a high contrast, but less of contrast can be just as effective if that suits your style. Try to choose a contrasting wood of a similar density to the planking. As the surface is being sanded, the harder wood will sand slower and end up being higher than the surrounding surface. If you must use a denser wood, finish up with a scraper to bring it down to the level of the soft wood. Finish by hand with a firm sanding block. Whatever wood you choose, for a clean fit, cut and machine all the planks at the same time and on the same machine setup.

If you don't have access to a power saw capable of making accurate, repetitive cuts at an angle, it is possible to make the cuts by hand. Make up a miter box that will give you a reasonably consistent angle and vertical cut. To compensate for the latck of precision that the miter box will give us, cut both pieces at the same time; lay the planks parallel and one on top of the other to make the cut.
Cut all the parts and lay them out on the pattern to be sure that they fit together and look like what you had in mind.
Putting the Pieces Together
Make up a jig that will keep all the pieces in a straight line and facilitate clamping the pieces together (Photograph 4-10). For a guide, staple a piece of planking parallel to the edge of the bench, with the cove side facing the edge of the bench. Position this guide in about two plank widths to accommodate the plank being made up. Another short clamping piece will fit into the cove of the glued-up plank and hold everything in place. Before fastening the fence down, it might be a good idea to cover the gluing area of the bench with plastic film or tape so that the plank doesn't become part of the bench.

Before applying the glue, do a dry run with all the pieces and clamps in place. You don't want any surprises with wet glue on the parts. When the two bevels are fit together and the edges parallel, draw a reference line across the joint so that you won't have to fumble with it with glue on the joint. Use a fast-setting carpenter's glue so you don't have to wait forever to assemble the next plank. Leave the pieces clamped up long enough for the glue to grab. You may need to do a destruction test with some scrap wood to find out what the glue's drying time is. After taking the glued-up plank out of the jig, check the joints and clean up any glue that has squeezed out of the joint.
When the planks are all glued up, arrange them in order and draw a reference line across all the planks. Use this reference to position the planks on the mold.